
>

How to Use a Testsealabs Rapid Test?

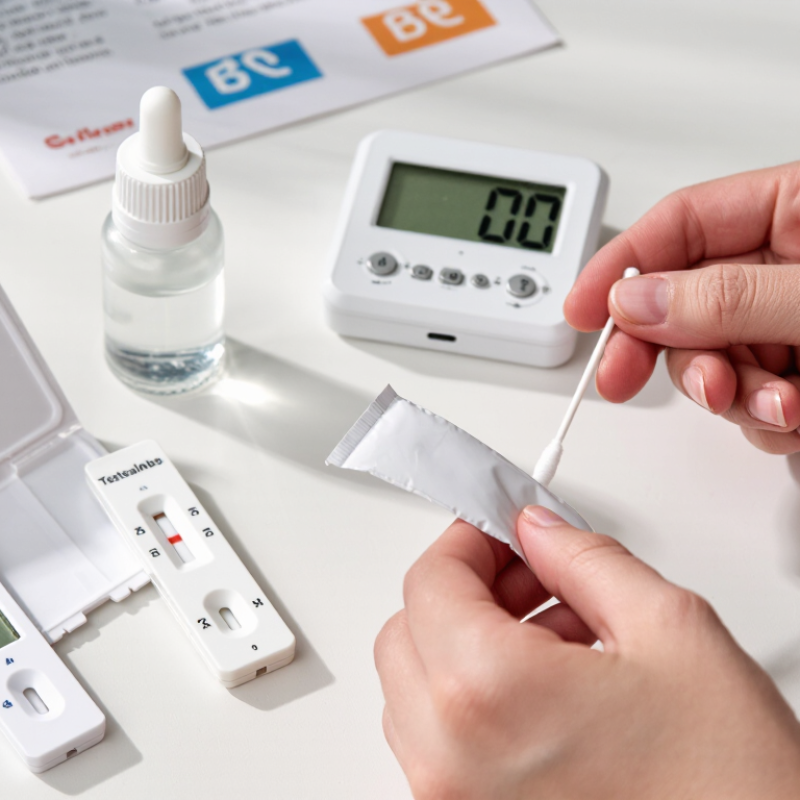
Using a Testsealabs Rapid Test may appear simple, but reliable testing depends on careful handling. This guide explains how to prepare the test, collect a suitable sample, follow the timing window, and read the result correctly. It also covers what an invalid line means and when professional medical advice may be necessary. Always check the package insert, because instructions can differ between product versions and sample types.

Dr. Michael Mina, a physician and epidemiologist known for his work on rapid testing, has described rapid antigen testing as “a snapshot in time.” That idea matters here. A negative Testsealabs Rapid Test does not guarantee that infection is impossible, especially during early illness or after recent exposure. Testing too soon, collecting an insufficient sample, or reading the strip outside the stated time can affect interpretation. Small details matter.

This is not a perfect process.

A clean surface, a timer, and washed hands can reduce avoidable mistakes. Users should avoid touching the swab tip, adding the wrong number of drops, or moving the cassette while it develops. Positive or unclear results should be handled according to the product instructions and local public-health guidance. If symptoms are severe, persistent, or worrying, contact a qualified healthcare professional. The aim is not merely to obtain a line on a cassette. It is to make a careful, informed decision with limited information.

How to Use a Testsealabs Rapid Test?

What the Testsealabs Rapid Test Is Designed to Detect

A rapid antigen test is designed to detect proteins from SARS-CoV-2, the virus that causes COVID-19. It usually uses a nasal swab and checks for viral antigen in the sample. This differs from antibody tests, which look for immune responses after infection. A positive result generally suggests current infection, especially when symptoms are present.

Performance depends on timing, sampling, and viral levels. A Cochrane review published in 2022 found average sensitivity of about 69% in symptomatic people and 55% in people without symptoms. Its pooled specificity was approximately 99.6%. These figures are useful, but they are not a promise for every test or user. The World Health Organization advises following the product instructions closely. The Centers for Disease Control and Prevention also notes that early infection can produce a negative result. A negative test can feel reassuring. Sometimes, that feeling is premature.

Tips: Test soon after symptoms begin, or after a recent exposure according to local health guidance. Swab gently but thoroughly, and check the expiry date. If symptoms continue, repeat testing as directed or seek advice from a qualified healthcare professional. One small error, such as an incomplete swab, can change the result.

How to Use a Testsealabs Rapid Test? - What the Testsealabs Rapid Test Is Designed to Detect

Data Dimension Evidence-Based Information Practical Use
Test category Rapid antigen test for the detection of an active SARS-CoV-2 infection. Provides a quick screening result without laboratory amplification equipment.
Target detected Proteins, commonly nucleocapsid antigens, associated with SARS-CoV-2. A positive result indicates that viral antigen was detected in the collected sample.
Specimen type A nasal specimen collected with the supplied swab, according to the product instructions. Correct sampling is essential because insufficient material may produce a false-negative result.
Testing method Lateral-flow immunoassay that uses antibodies to bind SARS-CoV-2 antigen. The test device displays a visible control line and, when applicable, a test line.
Typical result time Many rapid antigen tests produce a result in approximately 15–30 minutes; the package instructions take priority. Read the result only within the stated time window. Reading too early or too late can make the result unreliable.
Control line A visible control line shows that the test flow and basic test procedure worked. If the control line is absent, the result is invalid and the test should be repeated with a new device.
Positive result Both the control line and the test line are visible, even if the test line is faint. Treat the result as a likely current infection, follow local public-health guidance, and contact a healthcare professional when medical advice is needed.
Negative result Only the control line is visible within the valid reading period. A negative result does not completely rule out infection, especially during early infection or when symptoms are present.
Repeat testing A single antigen test may miss infection because antigen levels can vary over time. People with symptoms or a recent exposure may need repeat testing according to current health guidance.
What the test is not designed to detect It is not designed to diagnose influenza, respiratory syncytial virus, common-cold viruses, or other non-target infections unless specifically labeled as a combination test. A negative result for SARS-CoV-2 does not identify the cause of respiratory symptoms.
Key limitation Antigen tests are generally less sensitive than molecular tests, particularly when viral levels are low. A healthcare professional or laboratory molecular test may be appropriate when symptoms, exposure history, or clinical risk conflict with a negative result.
Safe-use requirements Use an unopened, undamaged test before its expiration date and follow the supplied instructions exactly. Wash or sanitize hands, use a clean surface, avoid contaminating the swab or extraction solution, and dispose of materials as directed.

Important: This table provides general information about SARS-CoV-2 rapid antigen testing. Always follow the specific instructions supplied with the test, and seek professional medical advice when symptoms are severe, persistent, or inconsistent with the test result.

What to Check Before Starting the Test

How to Use a Rapid Test: What to Check Before Starting

Before opening a rapid test, check the package for damage, moisture, or missing parts. Confirm the expiration date and storage conditions. Some products have updated expiration dates, so verify them through the manufacturer’s official instructions or a health authority database. Keep the cassette, swab, tube, and liquid together. Do not mix components from different kits. Read the full instructions once. Then read them again.

Set up a clean, level surface and wash your hands. Check which specimen is required, because nasal and saliva procedures differ. Use a timer, not guesswork. Do not eat, drink, smoke, or use nasal products if the instructions restrict them. Follow the sampling depth carefully. Too little material can produce a misleading result.

A common mistake.

The World Health Organization recommends high specificity and adequate sensitivity for screening tests, with target performance often near 80% sensitivity and 97% specificity. A 2022 Cochrane review found that rapid antigen tests detected about 73% of symptomatic infections and 55% of asymptomatic infections.

Timing matters. A negative result may be less reliable early in infection, so repeat testing may be advised. I would not treat one result as absolute evidence. Check the control line, record the time, and follow local clinical guidance when symptoms or exposure continue.

How to Collect and Prepare the Test Sample

How to Use a Rapid Test: How to Collect and Prepare the Test Sample

Begin with clean, dry hands and a level work surface. Check the test package, expiration date, and storage conditions. Let refrigerated materials reach room temperature before use. Read the instructions carefully, because sample types and tube designs can differ.

The collection step matters most. Small errors can affect the result.

For a nasal sample, gently blow your nose if needed. Avoid touching the soft swab tip. Insert it only as far as the instructions allow. Rotate it slowly against the inside of each nostril for the stated number of turns. Mild irritation can happen. Stop if you feel sharp pain or significant bleeding.

Many people rush this part. That is an easy mistake to make.

Place the swab into the extraction tube immediately. Rotate it while pressing the tip against the tube walls. This helps release the collected material. Remove the swab while squeezing the tube, then attach the provided nozzle or dropper.

Add only the instructed number of drops to the test device. Too little or too much liquid may produce an unclear result. Keep the device flat and read it within the specified time. Do not interpret changes that appear much later.

Dispose of used materials according to local health guidance, and wash your hands again. If the result is invalid, repeat the process with a new, undamaged test.

How to Perform the Test Step by Step

How to Use a Rapid Test: Perform the Test Step by Step

Before testing, wash and dry your hands, then check the package and expiration date. Read the instructions carefully, because sample types and timing can differ between tests. Place the cassette on a clean, level surface. Open the tube without touching the inside. Collect the sample exactly as directed, using gentle pressure rather than force. Too much pressure may cause discomfort or affect the sample.

Add the recommended number of drops to the test well. Start the timer immediately. Do not estimate the waiting period. I once nearly checked a test too early, and that small mistake could have changed my interpretation. Keep the cassette still while the reaction develops. Read the result only within the stated time window. A control line should appear. If it does not, the test is invalid, even when another line appears. Repeat with a new test if the instructions allow it.

A visible test line may be faint. Do not guess. Follow the result guide and consider confirmation through a qualified healthcare professional, especially after symptoms or recent exposure. Dispose of the used materials according to local waste guidance, then wash your hands again. Keep the test away from children and pets. Record the date and result if follow-up may be needed. Times matter. Strangely, the simplest step is often the one people skip: reading the instructions before opening the kit.

How to Interpret and Respond to the Results

A rapid test result is useful only when the test was performed and read correctly. Check the expiry date, package condition, and instructions before opening it. Wash and dry your hands. Use the sample exactly as directed, then start a timer. Timing matters. Do not interpret the strip too early or after the stated reading window, because evaporation lines can mislead you. A control line should appear. If it does not, the test is invalid, even when another line is visible. Repeat with a new test and follow the instructions more carefully.

A positive result usually means the target was detected, but it may still require confirmation from a healthcare professional. Avoid close contact with vulnerable people and ask about local medical guidance. Do not make major treatment decisions from one home result alone. A negative result means the target was not detected at that moment. It does not always exclude early infection, especially after recent exposure or when symptoms are present. Consider repeating the test after the recommended interval. A faint line can feel uncertain. Treat it cautiously as potentially positive until professional advice is available.

Record the test time, result, symptoms, and recent exposure. This information helps a clinician assess the result accurately. Seek urgent care for trouble breathing, chest pain, confusion, or rapidly worsening symptoms. Instructions vary between tests, and memory is not perfect. Read the leaflet again before acting.